Wednesday, June 30, 2010

All In One Box

When I saw this tutorial I had to make one of these boxes (or two, or three or.... you get the idea LOL).  After making a 'few' of them I decided I would try and make them to custome sizes and my cunning plan worked!  This gorgeous pink box is 7cm square and takes a full sheet of A4 Cardstock.

I just LOVE how this turned out and I am not inclined to use very girly shades of pink, I think I need to play more with them because this is just so darn sweet.


In case you haven't seen one of these open, here is another photo, they are not your average box!  You get access to the inside from the top of the box, very clever but a real pain to try and photograph!


I then decided I wanted to be able to get two out of a sheet of Designer Paper and this one came along, it is a cute 2 inches square.


Now here is a shot of them together.


I can see me making a lot more of these as Hostess Gifts and Door Prizes as well as for gift wrapping small presents, these will make something little so much more special and they are FUN to make. 

Pink Box
  • Stamps: Vintage Vogue
  • Cardstock: Regal Rose A4, Regal Rose DP
  • Ink: Regal Rose

  • Accessories: Pretty in Pink Tafetta Ribbon (Sponged with Regal Rose Ink), Scallop Border Punch, Half Pearl from Pretties Kit,
Blue Box
  • Stamps: None
  • Cardstock: Urban Garden DP, Not Quite Navy
  • Ink: None

  • Accessories: Kiwi Kiss /Very Vanilla Satin Ribbon, Button Bouquet Designer Buttons, Scallop Border Punch


Wednesday, June 23, 2010

Deals of the week - Week 4

Here are the deals for the final ‘Deals of the week’ promotion that Stampin’ Up! has had running, what a fantastic opportunity this has been to get some great items at awesome prices. This week is no exception with Sparkly Brads and Ribbon featuring.


These deals run from 23 June to 30 June. As in the past I would appreciate it if you could get your order and payment to me by midday on Tuesday the 29th so I can make sure that your order is in in time.

• Page 149, Square Ice Brads (109113) were $23.50 now $14.10

• Page 149, Circle Ice Brads (109111) were $23.50 now $14.10

• Page 149, Square Fire (109112) were $23.50 now $14.10

You don’t just get a couple of brads in these packs you get an awesome 80 Sparkly Rhinestone Brads in 4 colours and 3 sizes for the circles and 4 colours in 2 sizes for the squares, enough to bling up a whole lot of projects.

• Page 150, Bashful Blue 1” Ribbon (111848) was $23.50 now $12.93

• Page 151 Certainly Celery 5/8” Ribbon (109050) was $17.95 now $10.77

The Bashful Blue ribbon comes in a 9.1m roll and the Certainly Celery in a 10.9m roll. If you don’t think you can use that much consider splitting the rolls with a friend and getting some of each.

To take advantage of these specials e-mail me at trevlyn@paradise.net.nz or call me on (06) 368 4332.

Have a great day
Lynette
:-)

Tuesday, June 22, 2010

Another Waistcoat

I couldn't help myself, I had to make another waistcoat card, this time I used the Fabulous Very Vintage Wheel for my waistcoat.  Scroll down for the tutorial, it is in the next post :-)

Actually, this is pretty much a limited supplies card given the small number of materials I used but it has real impact, don't you just love it when that happens.


Stamps: Very Vintage Wheel
Card: Very Vanilla, Soft Suede
Ink: Soft Suede
Accessories: Sponge, Black Stampin' Write Marker, Dimensionals, Cropodile

Sunday, June 20, 2010

Waistcoat Card Tutorial


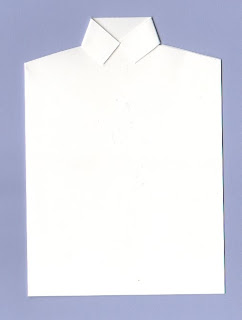
To make the waistcoat card you first need to print the template on a piece of A4 cardstock as shown and cut out each of the elements - please note that the full waistcoat front is a single unit, do not cut on the line that shows the overlap.  This is designed to exactly fit a piece of A5 cardstock folded in half (this is the colour of the shirt) if you do not use A5 cardstock the measurements are 5 13/16" x8 1/4"
With this in mind, cut out each of the elements.

The template in PDF form is here, ensure that you have scaling set to none and that the printer is printing in landscape mode.  Do not use the image below for printing, it is just a picture of what you will get.


This is what you should have when you have cut all the elements out:


On the shirt template there is a + between the collar pieces, using a piercing tool pierce the centre.  Fold your piece of A5 Cardstock in half (this is your shirt), place the shirt template on the front of the card and secure with clips, carefully cut away the top of the card using the template as a guide, using a pencil through the hole mark the centre point on the collar.

Open up and trim the collar off the back of the card.

 
Fold the top points of the collar down to the pencil mark and score the fold, the shirt should now look like this:


Next you need to trace the complete waistcoat, the hexagon and the tie bottom onto your chosen Designer Papers, sponge all the edges in a co-ordinating ink and add pen stitching using a Stampin' Write Marker, you should end up with this:


Now take the half waistcoat template and use it to draw in the overlap and as a mask to sponge some colour onto the overlap, add pen stitching.

Using the template from the mat pack and the 1/8" holes work out the placement for your buttons and use the template to draw the button circles onto the waistcoat, it should now look like this:


Using a Cropodile punch 3 3/8" circles from co-ordinating cardstock adhere over the circles you have drawn and add buttonholes using a Stampin' Write marker, it should now look like this:


Now it is time to assemble the card.  Place a Stampin' Dimentional on the back of the hexagon and adhere under the collar just covering the pencil mark you made earlier on the shirt, add the body of the tie, sliding it under the hexagon and centering it down the front of the card.  Adhere the waistcoat body over the top of the tie.

To finish off place a dimentional on each half of the collar and fold over the tie, you should now have something that looks like this:


I hope you have enjoyed this tutorial, believe it or not it has taken me all weekend to put it together! 

This tutorial is my gift to you as a fellow cardmaker, however, if you teach classes or sell your cards using this please consider using the tip jar on the template page to help motivate me to write more.  I will even e-mail you a PDF file of this tutorial if you do :-)

Have a great day
Lynette

Saturday, June 19, 2010

Fun With Vintage Vogue

I have just received the new Vintge Vogue stamp set and I am loving it, this is the first card I have made but it definitly won't be the last!


Stamps: Vintage Vogue
Cardstock: Rich Razzleberry, Melon Mambo, Whisper White
Ink: Soft Suede, Rich Razzleberry, Melon Mambo
Accessories: Sizzlits Lots of Tags, Manhattan Flower Embossing Folder, Soft Suede Ribbon, Stampin' Dimentionals

Wednesday, June 16, 2010

Deals of the Week - Week 3

This week we have stamps sets up to 50% off!

  • Page 34, A Happy Heart was $49.95 now $24.98
  • Page 57, Greetings Eight was $58.95 now $29.48
  • Page 78, Bella's Bloom was $28.95 now $17.37
  • Page 97, Enjoy Every Moment, was $62.95 now $31.48
  • Page 105, All Scallops was $66.95 now $33.48
So if any of these sets are on your Wish List now is the time to get them. 

Please call me on (06) 368 4332 or e-mail me at trevlyn@paradise.net.nz .  The order needs to be placed on Tuesday the 22nd of June so please get your order and payment to me by midday to ensure that you don't miss out on this weeks great special.

Have a great day
Lynette


Wednesday, June 9, 2010

Deals Of The Week #2

Woohoo, it's time for Deals Of The Week again - this week Stampin' Up! has given us a great deal on Designer Paper, so if you were hesitating to use your paper for envelopes etc stock up now because at this price there is no excuse for not using it.  They can all be found on pages 132 and 133 of the Main Idea Book and Catalogue.

  • Haiku Designer Series Paper - was $19.95 now $11.97
  • Pink Flamingo Designer Series Paper - was $19.95 now $12.97
  • Tea Party Designer Series Paper - was $19.95 now $11.97
  • Raspberry Tart Designer Series Paper - was $19.95 now $12.97
  • Sweet Slumber Speciality Designer Series Paper - was $27.95 now $18.17
The Sweet Slumber Designer Series Paper is not your ordinary paper, it is the weight of Card Stock and is textured, so if you have been wanting to try it now is the time.  Great for making boxes and other 3D items that need the strength of cardstock.

If you would like to order any of the above please feel free to call me on (06) 368 4332 or e-mail me at trevlyn@paradise.net.nz as with last week I will be placing an order for these next Tuesday the 15th of June, so I will need your order and payment by lunchtime.

Have a great day
Lynette