
Showing posts with label Retired. Show all posts
Showing posts with label Retired. Show all posts
Monday, July 13, 2009


For Father 2

How perfect is this card to say thank you to someone who has helped you out with some DIY. It can be so hard to make masculine cards sometimes but I think the secret is to keep the layout clean and simple.
I feel the watercolouring gives the card a lot of depth and shows that you have put time and thought into it without making it girly.
For Father 1
With school holidays I haven't had much of a chance to create but I have been going through some of my cards. I loved the stamp set For Father and was really sad when it didn't make it into the new catalogue.
I have three favourite cards I made with this set and haven't been able to part with. This is bordering on compulsive hording so I have decided to put them here so I can still look at them AND I can give the cards to some special people :-)
The image has been stamped in black StazOn on watercolour paper and coloured with stamp pad lids and a blender pen.

Wednesday, November 19, 2008
Colour Inspiration Challenge #31
Another fabulous colour challenge, if you want to play along click on the title of this post and it will take you straight to Kristina's challenge page.
 I love the colours, but I don't have any Pumpkin Pie or Elegant Eggplant card or ink - what is a girl to do? Why, use my Stampin' Pastel's of course! With these I have ALL the Stampin' Up! colours so there is no excuse not to play.
 I decided to use Poppin' Pastels technique to add the colour to the background (Pumpkin Pie) and the "frond" images (Elegant Eggplant). Lots of piercing, sponging and cutting later, this is what I came up with. I hope you enjoy it.
 Stamp Sets: Looks Like Spring, Petal Prints, Polka Dots and Paisley
Card: So Saffron, Close To Cocoa, Whisper White
Ink: So Saffron, Basic Brown, Versamark
Accessories: Dimentionals, Mat Pack, Spring Flower Bouquet Punch, Crystal Effects, Dazzling Diamonds, Stampin' Pastels, Sponge Dauber
Sunday, December 2, 2007
Wrapped Up In Christmas
This is one of the cards I did for my Christmas stamp a stack. It was a definite favourite - everyone loved that it was a "different" Christmas card, easy to make yet still very Christmassy.

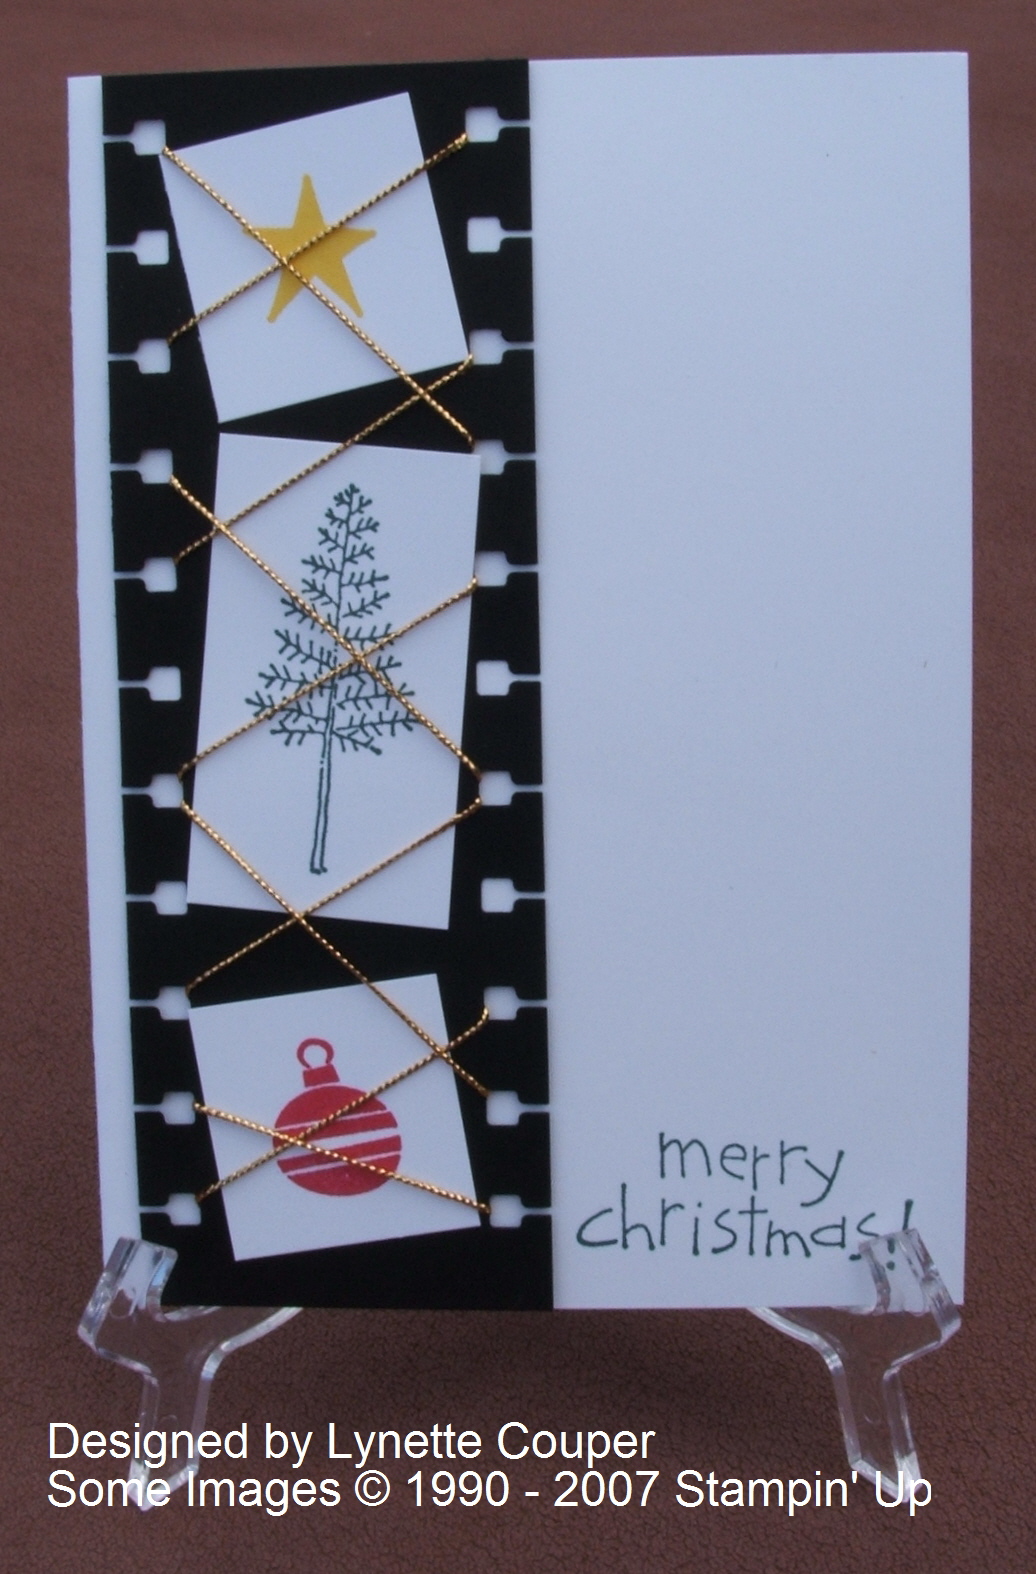
- Stamps: Hung Up on the Holidays, Loads of Love
- Card: Whisper White and Basic Black
- Ink: Summer Sun, Real Red and Handsome Hunter
- Accessories: Spiral Punch and Gold Cord
Saturday, November 17, 2007
ATC Swap for Field Training
We were lucky enough to have Field Training in Palmerston North last week. I decided to make ATC's for my swap using the polished stone technique. A tutorial for this great technique can be found here at Splitcoast.
I have simply mounted one of my ATC's on a piece of Brilliant Blue cardstock for a fun and friendly card.
I did two sheets of polished stone, one for the background and another for the jellyfishes head. I cut out his head and mounted it using Stampin Dimensionals.
I have simply mounted one of my ATC's on a piece of Brilliant Blue cardstock for a fun and friendly card.
I did two sheets of polished stone, one for the background and another for the jellyfishes head. I cut out his head and mounted it using Stampin Dimensionals.

- Stamps: Fishy Friends, Itty Bitty Backgrounds
- Card: Glossy White, Whisper White and Brilliant Blue
- Ink Pads: Stazon Black and Brilliant Blue (for sponging the edge of the card and stamping the background.
- Blue Polished Stone was done with Brilliant Blue, Tempting Turquoise and Encore Silver reinkers
- Green Polished Stone was done with Tempting Turquoise, Green Galore and Encore Silver Reinkers.
Friday, November 2, 2007
My First Tutorial - Christmas Cracker
Ok, I have decided to try and write a tutorial, I hope you can follow it!
I have converted the measurements to inches here
 Cut a piece of A4 card down to 14.5 cm wide, stamp one side randomly with images of your choice (I have used Peaceful Wishes stamped in Cranberry Crisp, True Thyme and Basic Brown). Score on the unstamped side at 13.5cm on the long side, turn the card and from each short side score at 5cm, 7cm and 9cm, I have marked the score lines on the photo if you are more of a visual person (I definitely am).


 Open up the cracker and cut the top and bottom tabs at a 45 degree angle as shown.
 Now put sticky strip the whole length of each of the tabs as shown (you don't want your cracker to pop open on its own!). I attached the belly band to the actual cracker before I assembled it. I cut a piece of Cranberry Crisp 13.5cm x 4cm and piece of Very Vanilla 13.5cm x 3cm. I stamped the Very Vanilla, then stuck the layer to the body of the cracker using sticky strip. Doing it now rather than later does make it quite stiff to fold!

 Place a cracker snap inside the cracker along with whatever other goodies will fit. Cut two pieces of 6mm wide grosgrain ribbon and tie around each end, trim and you are done!
I have converted the measurements to inches here
This pattern works really well with either A4 cardstock or 12 x12 Double Sided Designer Paper (you will get 2 crackers from each 12 x 12 sheet). I have used Very Vanilla cardstock for the cracker shown in the tutorial (double sided paper doesn't show up very well). On with the Tutorial then.
 Cut a piece of A4 card down to 14.5 cm wide, stamp one side randomly with images of your choice (I have used Peaceful Wishes stamped in Cranberry Crisp, True Thyme and Basic Brown). Score on the unstamped side at 13.5cm on the long side, turn the card and from each short side score at 5cm, 7cm and 9cm, I have marked the score lines on the photo if you are more of a visual person (I definitely am).
Now fold the card into the centre on the 7cm score lines (the middle one of the three at each end) as shown in the photo.

Next you will need my "monster teeth" template. I couldn't work out how to put it here so I have uploaded it at Splitcoast Stampers here
When you print it ensure that page scaling is set to none, they have to be 13.5cm wide by 4cm deep. I print directly onto a contrasting colour of card to make my life easier. Using paper clips attach the monster teeth as shown, the piece on the left is the small score line.
When you print it ensure that page scaling is set to none, they have to be 13.5cm wide by 4cm deep. I print directly onto a contrasting colour of card to make my life easier. Using paper clips attach the monster teeth as shown, the piece on the left is the small score line.

Cut out the teeth using a pair of scissors. When you get to the tab piece on the left hand side cut towards the template at a 45 degree angle as shown. Repeat on the other end.
 Open up the cracker and cut the top and bottom tabs at a 45 degree angle as shown.
 Now put sticky strip the whole length of each of the tabs as shown (you don't want your cracker to pop open on its own!). I attached the belly band to the actual cracker before I assembled it. I cut a piece of Cranberry Crisp 13.5cm x 4cm and piece of Very Vanilla 13.5cm x 3cm. I stamped the Very Vanilla, then stuck the layer to the body of the cracker using sticky strip. Doing it now rather than later does make it quite stiff to fold!
Stick the middle section together first - it is really hard to reach into the middle from the outside (yes, that is the voice of experience talking!).
 Place a cracker snap inside the cracker along with whatever other goodies will fit. Cut two pieces of 6mm wide grosgrain ribbon and tie around each end, trim and you are done!
If you have any problems following my directions please feel free to contact me.
Have a great day :-)
Wednesday, October 17, 2007
Progressive Scrapbook Page
I love the concept of progressive pages - where you firstly create a 6 x 6 inch page(Creamy Caramel), then use it to create an 8 1/2 x 11 inch page (Old Olive), then upsize the whole thing to a 12 x 12 inch page (More Mustard).
It is so much easier to start out small then build it up. I even managed to fit my title and journal ling on the 6 x 6 page!
It is so much easier to start out small then build it up. I even managed to fit my title and journal ling on the 6 x 6 page!

- Stamps: Greetings Galore, Pure and Simple Alphabet Upper, Watercolor Joy Wheel
- Ink: Versamark, Basic Black
- Card: Creamy Caramel, More Mustard, Old Olive
- Accessories: Sanding Block (for sanding the edges of the photos), Stampin' Write Journaler
Sunday, October 14, 2007
Thinking of You
I love the mat pack and have been playing with faux stitching using the white gel pen, I love this technique and the way it dresses up a small image on a card.

- Stamps: Greetings Galore, Itty Bitty Backgrounds
- Card: Whisper White, Green Galore, Basic Black
- Ink: Green Galore, Basic Black
- Accessories: Mat Pack, White Gel Pen, my fingernail for distressing
Saturday, October 13, 2007
Baby Card for a Friend
A friend asked to make a baby card for her which put me in a bit of a panic - I don't have any baby stamps from Stampin' Up!, then I remembered that there was a baby stamp in Greetings Galore (it made such a big impression that it hadn't even seen ink), don't get me wrong, I like Greetings Galore, but the baby stamp did not inspire me. Time to stretch the brain cells a bit! Here is what I came up with and I like it and my friend liked it - yippeee!

- Stamps: Greetings Galore, Weathered, All About You
- Card: Very Vanilla, Bashful Blue
- Ink: Basic Brown and Bashful Blue (both used for colouring as well as stamping)
- Accessories: Hodge Podge Hardware, Gold Organdy Ribbon and my finer for distressing :-)
Looks Like Spring
How appropriate - it is spring here in New Zealand (although at the moment it doesn't feel a lot different to winter!). I decided I needed some bright spring like cards and also set myself two challenges, the first is to use up scraps from my ever growing stash and the second to use yellow, a colour I tend to have difficulty with. These two cards are the result:

- Stamps: Looks Like Spring
- Card: Green Galore, Brilliant Blue, Real Red and Whisper White
- Ink: Summer Sun and Real Red
- Accessories: Corner Rounder, Mat Pack, White Gel Pen, Dazzling Diamonds, Spring Bouquet Flower Punch

- Stamps: Looks Like Spring
- Card: Brilliant Blue, Real Red, Green Galore, Only Orange, Whisper White
- Ink: Summer Sun, Green Galore, Real Red , Only Orange
- Accessories: Spiral Punch, Corner Rounder Punch and Dazzling Diamonds, Spring Bouquet Flower Punch
Subscribe to:
Posts (Atom)
