Sunday, December 2, 2007

Wrapped Up In Christmas

This is one of the cards I did for my Christmas stamp a stack. It was a definite favourite - everyone loved that it was a "different" Christmas card, easy to make yet still very Christmassy.


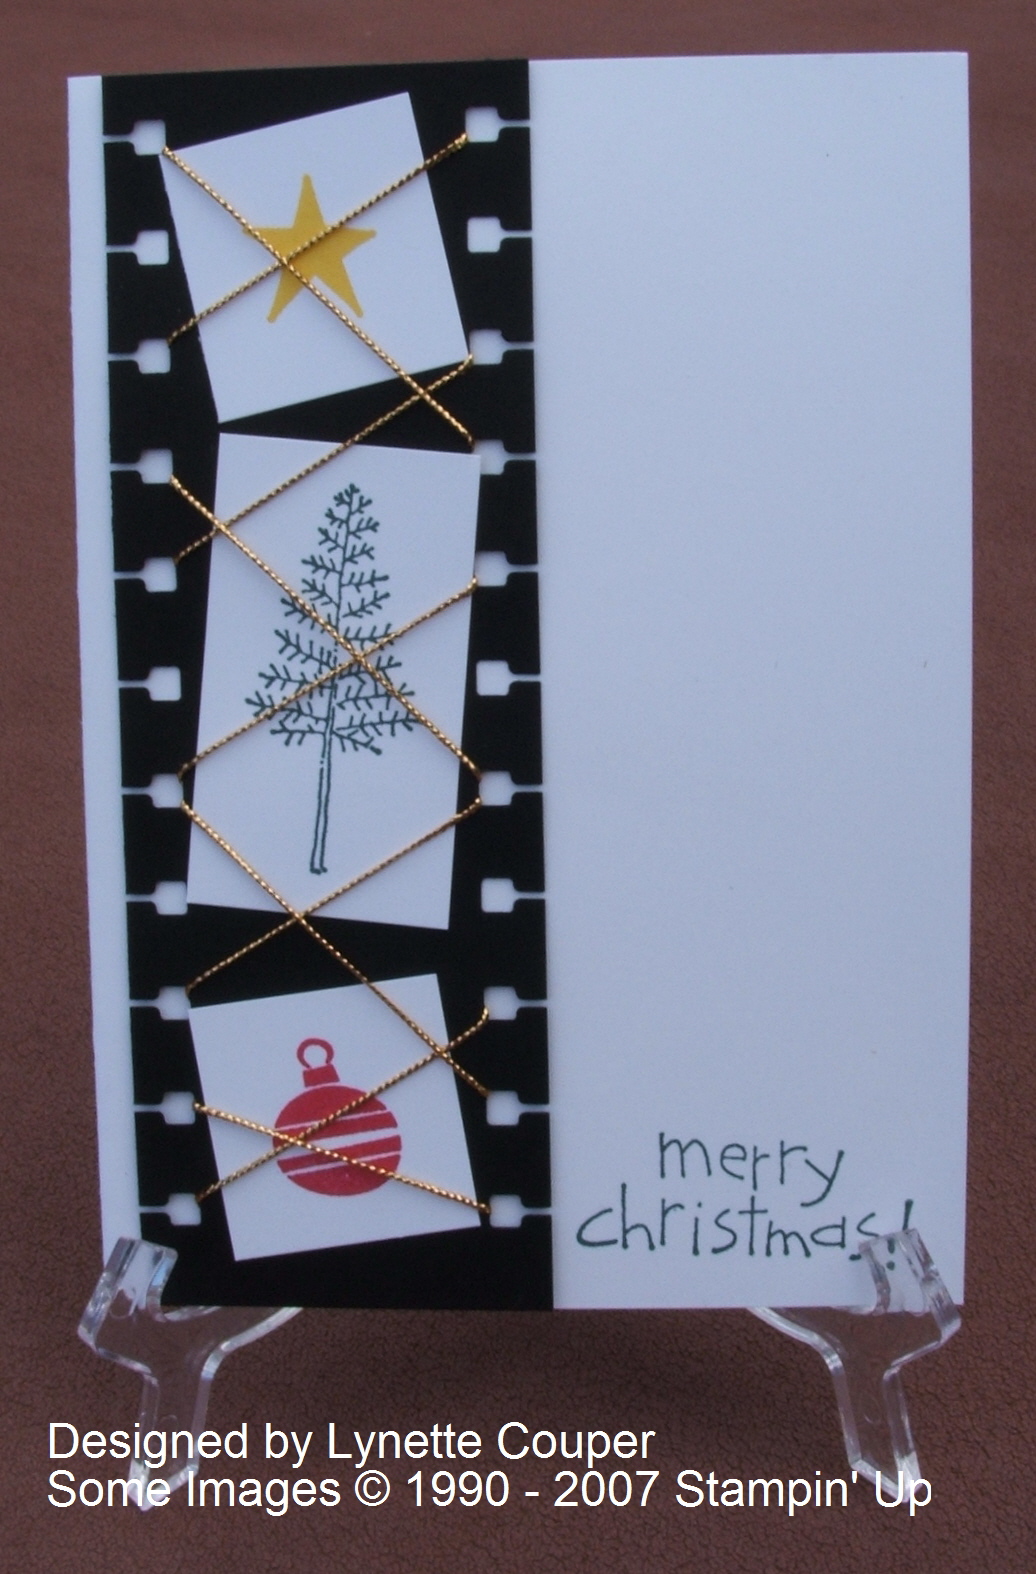
  • Stamps: Hung Up on the Holidays, Loads of Love
  • Card: Whisper White and Basic Black
  • Ink: Summer Sun, Real Red and Handsome Hunter
  • Accessories: Spiral Punch and Gold Cord

Monday, November 26, 2007

3 Inch mini Album

I recently found The Craft Weekly site and am in love with their 'Webisode' video tutorials. I made this little book by following the fantastic instructions given by Karen Thomas here. I bound it as a traditional book, but this fantastic way of putting these books together allows for accordian albums and photo cubes!

My little book is made from one sheet of single sided Stampin' Up! designer paper (from the rustic collection), 1 sheet of A4 Card in True Thyme and about 16 inches of Chocolate Grossgrain Ribbon. These are so simple to make and are very addictive.


Saturday, November 17, 2007

ATC Swap for Field Training

We were lucky enough to have Field Training in Palmerston North last week. I decided to make ATC's for my swap using the polished stone technique. A tutorial for this great technique can be found here at Splitcoast.

I have simply mounted one of my ATC's on a piece of Brilliant Blue cardstock for a fun and friendly card.

I did two sheets of polished stone, one for the background and another for the jellyfishes head. I cut out his head and mounted it using Stampin Dimensionals.

  • Stamps: Fishy Friends, Itty Bitty Backgrounds
  • Card: Glossy White, Whisper White and Brilliant Blue
  • Ink Pads: Stazon Black and Brilliant Blue (for sponging the edge of the card and stamping the background.
  • Blue Polished Stone was done with Brilliant Blue, Tempting Turquoise and Encore Silver reinkers
  • Green Polished Stone was done with Tempting Turquoise, Green Galore and Encore Silver Reinkers.

Sunday, November 11, 2007

School Plays

My children were both in their school plays this year. Unfortunately the lighting and my distance from the stage didn't result in the best photos I have ever taken but I definitely wanted the occasions saved in my scrapbook so I decided to make quick and easy pages with minimal embellishments.

These pages were so quick to put together, I used a 12 x 12 piece of Brilliant Blue and Barely Banana, 2 A4 sheets of the same colour (I didn't trim them at all, I just attached them to the page with an even border on three sides - it is a bit hard to see in The Babes in Toyland one because the scanner I used isn't quite 12 inches wide), and 2 A4 sheets of Basic Black that I cut into quarters - it is so much more economical to cut 4 mats from one A4 sheet and crop the small amount needed to make them fit than to only get 2 mats from an A4 sheet and lots of scraps.

I hand drew the Truffular Trees on Only Orange, Yoyo Yellow and Glorious Green and covered them with dazzling diamonds. In the Babes in Toyland Layout I drew the elf shoe on Glorious Green and just cut it out.

The Lorax Title is actually a photo I took of the banner - I just cut each of the letters out and attached them to the layout. The Babes in Toyland title is done with my handy dandy Pure and Simple Alphabet Upper.

I have blacked out everyones faces except for my own children.


Devon was a Truffular Tree and a narrator in his schools version of The Lorax.

Natasha was a elf and kindly volunteered me to make 9 pairs of elf shoes in three different sizes. I don't quite know what this says about me but I had plenty of the right shade of green sweatshirting to make them. Thanks to the internet I found a pattern that I could adjust to fit everyone! By the time I had finished them everyone was used to me saying "Have I told you lately how much I hate elf shoes!".

Cracker Tutorial - Inch Measurements

I have worked out the inch measurements for the cracker tutorial, this is a very New Zealand cracker made with the new measurements :-)


If you use 8 1/2 x 11 cardstock the body of the cracker will be an inch shorter so I recommend using 12 x 12 cardstock or Double Sided Desisgner Paper. Substiture the following measurements for the metric ones in the main tutorial.


  • Cut to 12 inches by 5 3/4 inches (14.5 cm).
  • Score the long side at 5 5/16 of an inch (13.5cm).
  • Score each short end at 2, 2 3/4 and 3 1/2 inches (5,7 and 9 cm).


These measurements will enable you to use the monster teeth template in the main tutorial.

Have a great day.
:-)

Friday, November 2, 2007

My First Tutorial - Christmas Cracker

Ok, I have decided to try and write a tutorial, I hope you can follow it!

I have converted the measurements to inches here

This pattern works really well with either A4 cardstock or 12 x12 Double Sided Designer Paper (you will get 2 crackers from each 12 x 12 sheet). I have used Very Vanilla cardstock for the cracker shown in the tutorial (double sided paper doesn't show up very well). On with the Tutorial then.

Cut a piece of A4 card down to 14.5 cm wide, stamp one side randomly with images of your choice (I have used Peaceful Wishes stamped in Cranberry Crisp, True Thyme and Basic Brown). Score on the unstamped side at 13.5cm on the long side, turn the card and from each short side score at 5cm, 7cm and 9cm, I have marked the score lines on the photo if you are more of a visual person (I definitely am).


Now fold the card into the centre on the 7cm score lines (the middle one of the three at each end) as shown in the photo.


Next you will need my "monster teeth" template. I couldn't work out how to put it here so I have uploaded it at Splitcoast Stampers here


When you print it ensure that page scaling is set to none, they have to be 13.5cm wide by 4cm deep. I print directly onto a contrasting colour of card to make my life easier. Using paper clips attach the monster teeth as shown, the piece on the left is the small score line.


Cut out the teeth using a pair of scissors. When you get to the tab piece on the left hand side cut towards the template at a 45 degree angle as shown. Repeat on the other end.


Open up the cracker and cut the top and bottom tabs at a 45 degree angle as shown.


Now put sticky strip the whole length of each of the tabs as shown (you don't want your cracker to pop open on its own!). I attached the belly band to the actual cracker before I assembled it. I cut a piece of Cranberry Crisp 13.5cm x 4cm and piece of Very Vanilla 13.5cm x 3cm. I stamped the Very Vanilla, then stuck the layer to the body of the cracker using sticky strip. Doing it now rather than later does make it quite stiff to fold!

Stick the middle section together first - it is really hard to reach into the middle from the outside (yes, that is the voice of experience talking!).


Place a cracker snap inside the cracker along with whatever other goodies will fit. Cut two pieces of 6mm wide grosgrain ribbon and tie around each end, trim and you are done!


If you have any problems following my directions please feel free to contact me.
Have a great day :-)

Wednesday, October 31, 2007

Coaster Made With Scraps

I was in the $2 shop today and found a set of four cork backed coasters, they were really nice except for the hideous picture on them.

I had a look around my stash and my eyes fell upon the leftover designer paper from the diary I made for next year. Out came Scribble This again and this is what appeared a few minutes later. I think I might make a few sets for Christmas presents (my husband thought it was made of leather when he first saw it).

  • Stamps: Scribble This
  • Ink: Basic Brown, Cranberry Crisp, True Thyme
  • Paper: Rustic Designer Paper
  • Accessories: My favourite - Crystal Effects (for gluing the paper down and for sealing the coaster), Sanding Block, Sponge Dauber


Monday, October 29, 2007

Nice and Easy Scrapbooking

Here is the first page that I put together of our weekend away. My son was being silly and pulling faces and poses so I just kept snapping away - I love the expressions that I caught and I wanted to scrap a simple layout that kept the emphasis on him and I am thrilled with the way it came out!


  • Stamps: Pure and Simple Alphabet Upper
  • Ink: Brilliant Blue pad and Brilliant Blue Stampin' Write Marker
  • Card: Brilliant Blue, Basic Black, Notations Double Sided Designer Paper
  • Accessories: Crystal Effects (I used it to glue everything down and to add water drop accents), Spiral Punch (a must have for me), Bread and Butter Plate (my circle template).

Friday, October 26, 2007

Next Years Diary

I got an On Board Art Journal with the intention of using it for next years diary. As usual I couldn't bear to touch it in case I messed it up! I told myself I just had to suck it up and do it and this is the result - it is exactly what I want and I am thrilled with how it came out.


How did I get started? I decided I wanted neutral tones so I picked up my Basic Brown pad and a sponge dauber and started sponging around the outside of the cover, by the time I had finished that I had found my confidence and went hunting in my stash with bits to dress it up. Somehow I felt that once the sponging was there it was no longer perfect so I gave myself permission to play - go figure :-)


I played with my On Board Accents (once again stashed because they were too precious to use - I really have to get over this), designer paper, hodgepodge hardware, ribbon I had previously dyed using a basic brown reinker and a sanding block to name a few. I stuck everything down with Crystal Effects - darn I love that stuff - and glazed the On Board Accents with it to protect them, the outside was done (or maybe a work in progress. there is still plenty of room to add more treasures) and the effect was great!

To do the diary pages I made a universal calendar template in word and printed it out, trimmed it and stuck it to the inside page with Crystal Effects. I then wrote the dates in, stamped the month and generally had a blast stamping everything else, the second page I just ruled and stamped. I will be using this primarily for workshop bookings so the 10 blocks are ample (I never intend doing more than 10 workshops a month).

To use my diary I just write the name of the person hosting the workshop on the main calendar, write the date at the top of one of the rectangles on the second page followed by their details - simple to follow and I can see at a glance where I can slot people in. Best of all I can also block out days that I can't work for personal reasons (such as my sons birthday).

I think I will be able to fit a few years worth in this journal and love that I create each and every month the way I want to! If I need an extra page for some reason it won't be a problem to insert using the spiral punch.

Thursday, October 18, 2007

Just a Quick Note

Just a quick note today as we are about to head off to the beautiful Marlbourough Sounds for an extended Labour Weekend. Hopefully I will have some great scrapbook pages to put up after I scrap the photos I intend taking. Have a great Labour Weekend and I will be back the middle of next week.

Wednesday, October 17, 2007

Progressive Scrapbook Page

I love the concept of progressive pages - where you firstly create a 6 x 6 inch page(Creamy Caramel), then use it to create an 8 1/2 x 11 inch page (Old Olive), then upsize the whole thing to a 12 x 12 inch page (More Mustard).

It is so much easier to start out small then build it up. I even managed to fit my title and journal ling on the 6 x 6 page!

  • Stamps: Greetings Galore, Pure and Simple Alphabet Upper, Watercolor Joy Wheel
  • Ink: Versamark, Basic Black
  • Card: Creamy Caramel, More Mustard, Old Olive
  • Accessories: Sanding Block (for sanding the edges of the photos), Stampin' Write Journaler

Tuesday, October 16, 2007

Pastel Workshop Card

A friend of mine bought the pastels and wanted some ideas of how to use them so I came up with this card for her.

I stamped the flower with white craft ink then embossed it with white embossing powder - the fun part was colouring in the flower using a blender pen and the pastels, it really pops on the black card! When we had finished coloring in the flower we quickly zapped it with the heat gun again to set the pastels.

The ribbon started out in life as plain white grossgrain, we staped along the length of it with versamrk ink. chalked up a cotton ball then dabbed it along the length of the ribbon, to get the colour to teally stick we then rubbed the ribbon hard with the cotton ball.

The Scribble Wheel background was coloured using a blender pen and pastels.

All up it quite a simple card to do although a bit time consuming, but I think the results justify the time, and it is so much fun using one colouring medium to get so many different results.

  • Stamps: Heartfelt Thanks, Scribble Wheel, Warmest Regards
  • Card: Whisper White, Basic Black
  • Ink: Basic Black, Versamark, White Craft
  • Accessories: White Embossing Powder, White Grossgrain Ribbon, Copper Brad, Mat Pack, Pastels

Sunday, October 14, 2007

Thinking of You

I love the mat pack and have been playing with faux stitching using the white gel pen, I love this technique and the way it dresses up a small image on a card.


  • Stamps: Greetings Galore, Itty Bitty Backgrounds

  • Card: Whisper White, Green Galore, Basic Black

  • Ink: Green Galore, Basic Black

  • Accessories: Mat Pack, White Gel Pen, my fingernail for distressing

Saturday, October 13, 2007

Baby Card for a Friend

A friend asked to make a baby card for her which put me in a bit of a panic - I don't have any baby stamps from Stampin' Up!, then I remembered that there was a baby stamp in Greetings Galore (it made such a big impression that it hadn't even seen ink), don't get me wrong, I like Greetings Galore, but the baby stamp did not inspire me. Time to stretch the brain cells a bit! Here is what I came up with and I like it and my friend liked it - yippeee!

  • Stamps: Greetings Galore, Weathered, All About You
  • Card: Very Vanilla, Bashful Blue
  • Ink: Basic Brown and Bashful Blue (both used for colouring as well as stamping)
  • Accessories: Hodge Podge Hardware, Gold Organdy Ribbon and my finer for distressing :-)

Looks Like Spring

How appropriate - it is spring here in New Zealand (although at the moment it doesn't feel a lot different to winter!). I decided I needed some bright spring like cards and also set myself two challenges, the first is to use up scraps from my ever growing stash and the second to use yellow, a colour I tend to have difficulty with. These two cards are the result:

  • Stamps: Looks Like Spring
  • Card: Green Galore, Brilliant Blue, Real Red and Whisper White
  • Ink: Summer Sun and Real Red
  • Accessories: Corner Rounder, Mat Pack, White Gel Pen, Dazzling Diamonds, Spring Bouquet Flower Punch

  • Stamps: Looks Like Spring
  • Card: Brilliant Blue, Real Red, Green Galore, Only Orange, Whisper White
  • Ink: Summer Sun, Green Galore, Real Red , Only Orange
  • Accessories: Spiral Punch, Corner Rounder Punch and Dazzling Diamonds, Spring Bouquet Flower Punch

Friday, October 12, 2007

Challenge details

Here is the card I use at my workshops:

My challenge to you is to use the photo which can be found here: http://nzlyn.blogspot.com/2007/10/have-magical-day.html to make a card. To save a copy of the photo just click on it, right click and choose save as to save it to your computer where you should be able to resize it.

Upload your card and put a link to your photo in the comments section so other people can see what you have done :-)

When I print the photo I normally print four on 6 x 4 photo paper.

At my workshops people have made some amazing cards using the minimal supplies that I take so I can't wait to see what you do with it.

An added bonus is that I am quite happy for you to use the photo for your personal cards and for Stampin' Up! demos to use it at their workshops. The only thing that I ask is you don't mass produce it for profit.

I hope you enjoy participating in my little challenge :-)

Thursday, October 11, 2007

And Still More Scribble This......

Believe it or not, I do have other stamp sets, it's just that this flower worked so well with this design!

I needed a gift card holder card for work, one of the ladies has just done 20 years and work bought her a fairly decent sized voucher as a gift. I didn't want her to get just a piece of plastic so thought it would be nice to make her a card.

You can't see it in the scan but it lifts up at the scallop edge and there is a pocket inside for the gift card.

Splitcoast Stampers to the rescue - I found the perfect tutorial here http://bellepapier.blogs.splitcoaststampers.com/2007/09/06/pocket-card-a-challenge-a-tutorial/ thanks so much Julia for your fantastic tutorial, it was exactly what I needed! This card was the result:

Supplies Used:

Cardstock - Very Vanilla (it looks quite white in the scan), Cranberry Crisp, Marigold Morning and True Thyme Ink Pads - Basic Brown and Cranberry Crisp (to colour the flower)
Ribbon - Gold Organdy
Accessories - My fingernail to distress the edges, Sponge Dauber, Dimentionals, Slit Punch, Mat Pack
Non Stampin' Up! buttons from my stash - but they matched so well I had to use them!

Wednesday, October 10, 2007

More Scribble This :-)

I am really enjoying playing with this set, this time I added the scribble wheel. I think it is the versatility that makes this stamp set so special, you can go from soft and subtle to bright and bold so easily.

I have used only products available from Stampin' Up! as follows:
Whisper White and Basic Black cardstock
Whisper White craft ink and basic black classic ink
Scribble This and Sweet Hello stamps sets, Scribble Stampin' Around Wheel
White Gel Pen
Bold Bright Stampin' Write markers
Dazzling Diamonds

Tuesday, October 9, 2007

I love the Stampin' Up Scribble This set and recently got the Weathered Background stamp - I think they look
fabulous together!

Have a Magical Day


This is photo I took then altered, the toadstool was screaming to have a fairy sit on top of it!
I have done it! I actually created a blog, now I have to try and remember to post to it LOL :-)